
LLM Inference on Edge: A Fun and Easy Guide to run LLMs via React Native on your Phone!
- +91


As LLMs continue to evolve, they are becoming smaller and smarter, enabling them to run directly on your phone. Take, for instance, the DeepSeek R1 Distil Qwen 2.5 with 1.5 billion parameters, this model really shows how advanced AI can now fit into the palm of your hand!
In this blog, we will guide you through creating a mobile app that allows you to chat with these powerful models locally. The complete code for this tutorial is available in our EdgeLLM repository . If you've ever felt overwhelmed by the complexity of open-source projects, fear not! Inspired by the Pocket Pal app, we will help you build a straightforward React Native application that downloads LLMs from the Hugging Face hub, ensuring everything remains private and runs on your device. We will utilize llama.rn , a binding for llama.cpp , to load GGUF files efficiently!
Why You Should Follow This Tutorial?
This tutorial is designed for anyone who:
- Is interested in integrating AI into mobile applications
- Wants to create a conversational app compatible with both Android and iOS using React Native
- Seeks to develop privacy-focused AI applications that operate entirely offline
By the end of this guide, you will have a fully functional app that allows you to interact with your favorite models.
0. Choosing the Right Models
Before we dive into building our app, let's talk about which models work well on mobile devices and what to consider when selecting them.
Model Size Considerations
When running LLMs on mobile devices, size matters significantly:
- Small models (1-3B parameters) : Ideal for most mobile devices, offering good performance with minimal latency
- Medium models (4-7B parameters) : Work well on newer high-end devices but may cause slowdowns on older phones
- Large models (8B+ parameters) : Generally too resource-intensive for most mobile devices, but can be used if quantized to low precision formats like Q2_K or Q4_K_M
GGUF Quantization Formats
When downloading GGUF models, you'll encounter various quantization formats. Understanding these can help you choose the right balance between model size and performance:
Legacy Quants (Q4_0, Q4_1, Q8_0)
- Basic, straightforward quantization methods
- Each block is stored with: • Quantized values (the compressed weights). • One (_0) or two (_1) scaling constants.
- Fast but less efficient than newer methods => not used widely anymore
K-Quants (Q3_K_S, Q5_K_M, ...)
- Introduced in this PR
- Smarter bit allocation than legacy quants
- The K in “K-quants” refers to a mixed quantization format, meaning some layers get more bits for better accuracy.
- Suffixes like _XS, _S, or _M refer to specific mixes of quantization (smaller = more compression), for example : • Q3_K_S uses Q3_K for all tensors • Q3_K_M uses Q4_K for the attention.wv, attention.wo, and feed_forward.w2 tensors, and Q3_K for the rest. • Q3_K_L uses Q5_K for the attention.wv, attention.wo, and feed_forward.w2 tensors, and Q5_K for the rest.
I-Quants (IQ2_XXS, IQ3_S, ...)
- It still uses the block-based quantization, but with some new features inspired by QuIP
- Smaller file sizes but may be slower on some hardware
- Best for devices with strong compute power but limited memory
Recommended Models to Try
Here are some models that perform well on mobile devices:
- SmolLM2-1.7B-Instruct
- Qwen2-0.5B-Instruct
- Llama-3.2-1B-Instruct
- DeepSeek-R1-Distill-Qwen-1.5B
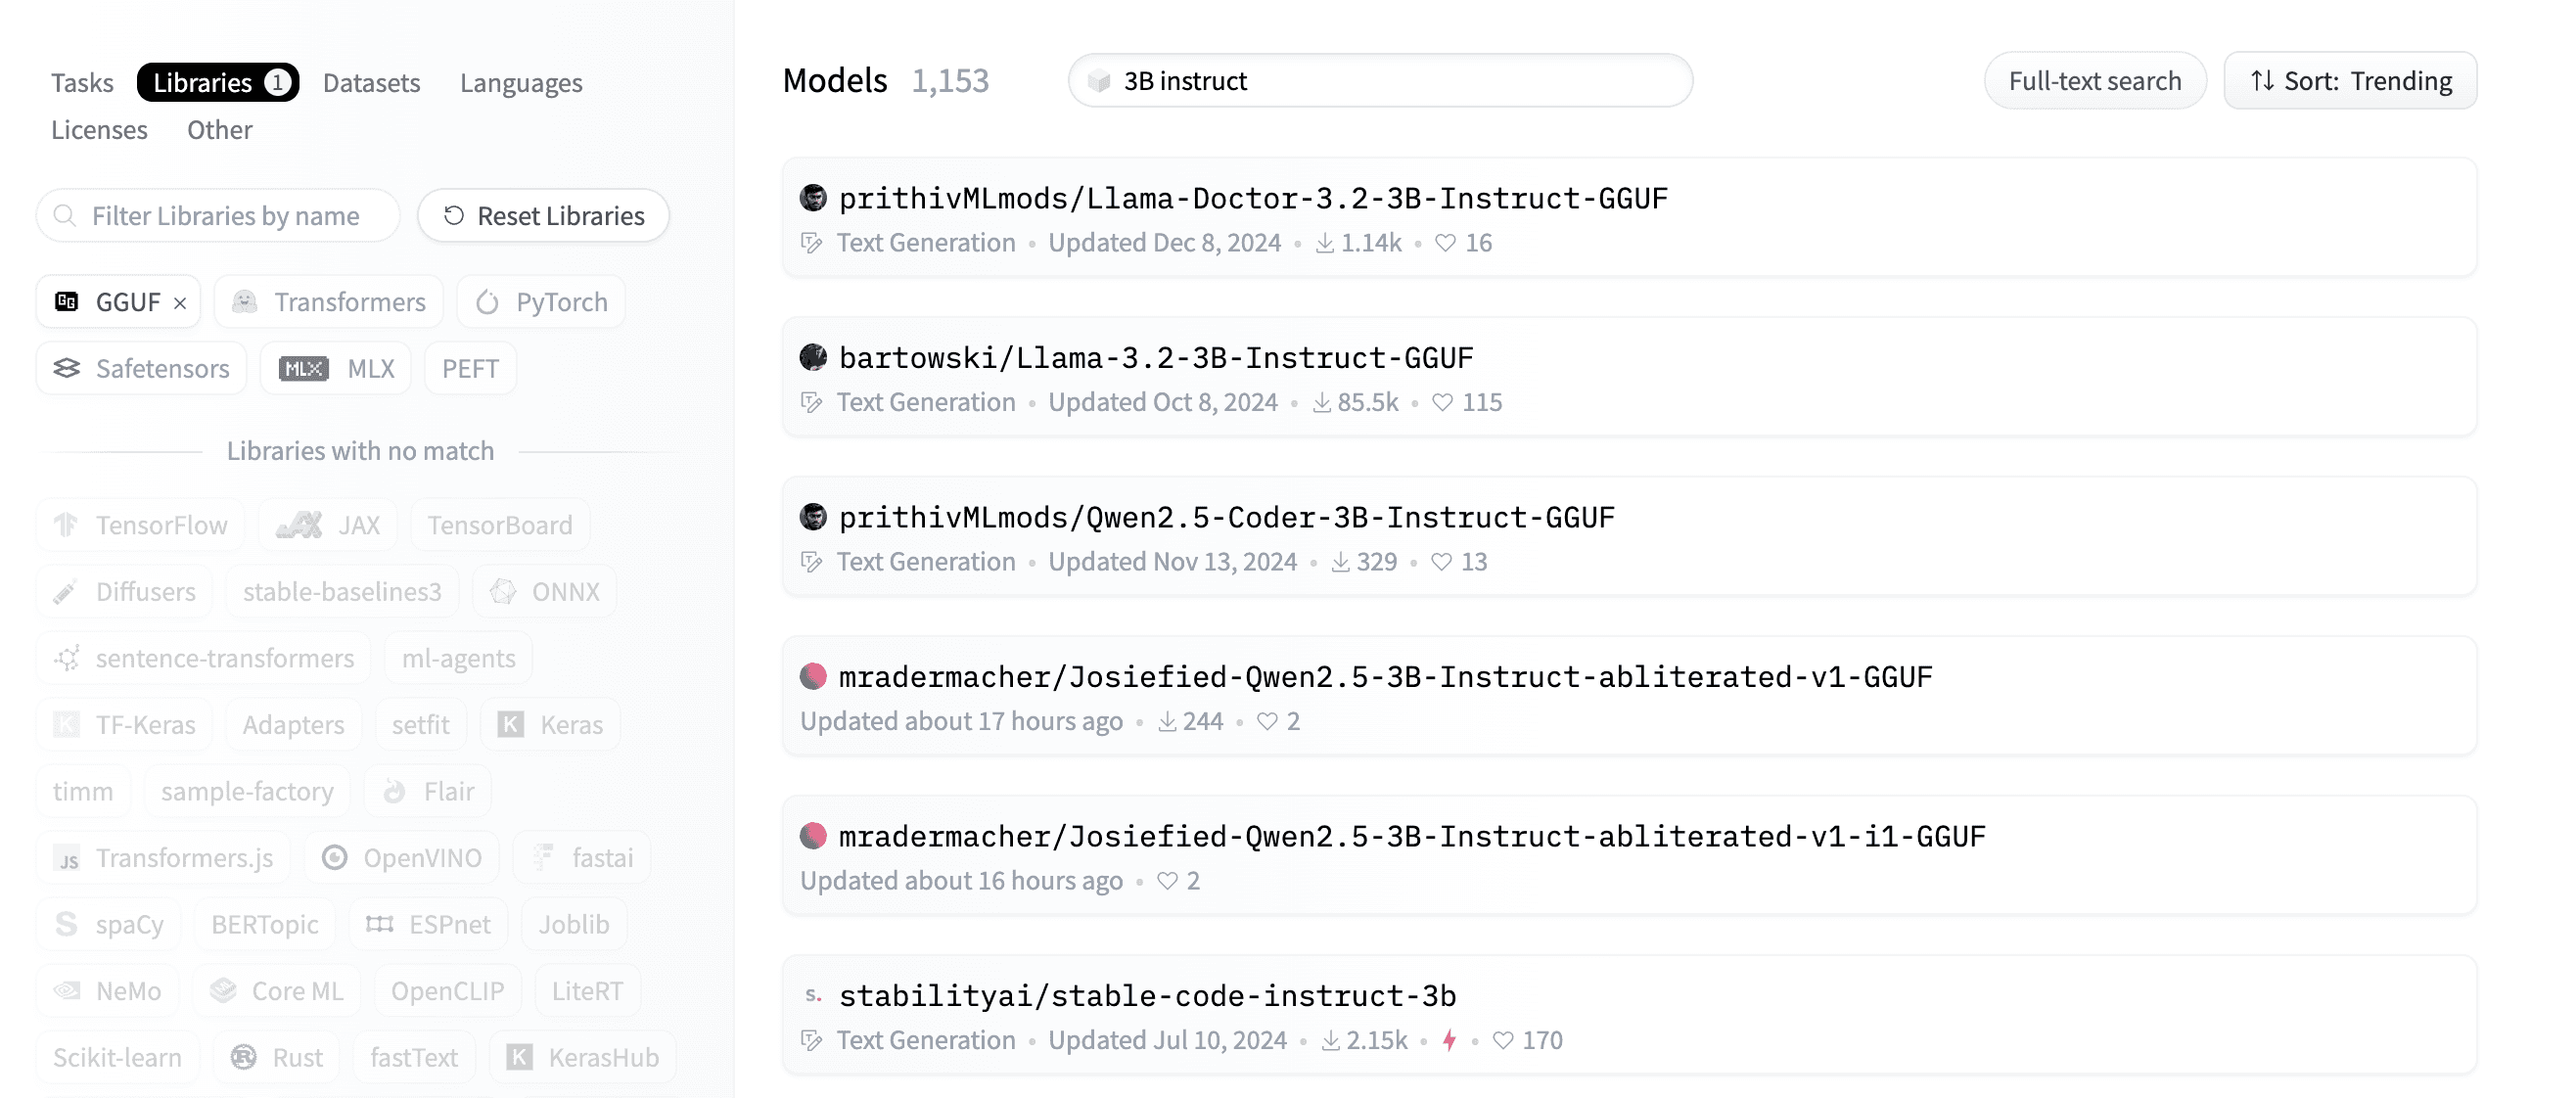
Finding More Models
To find additional GGUF models on Hugging Face:
- Visit huggingface.co/models
- Use the search filters: Visit the GGUF models page
- Specify the size of the model in the search bar
- Look for "chat" or "instruct" in the name for conversational models
When selecting a model, consider both the parameter count and the quantization level. For example, a 7B model with Q2_K quantization might run better than a 2B model with Q8_0 quantization. So if you can fit a small model comfortably on your device try to use a bigger quantized model instead, it might have a better performance.
1. Setting Up Your Environment
React Native is a popular framework for building mobile applications using JavaScript and React. It allows developers to create apps that run on both Android and iOS platforms while sharing a significant amount of code, which speeds up the development process and reduces maintenance efforts.
Before you can start coding with React Native, you need to set up your environment properly.
Tools You Need
- Node.js: Node.js is a JavaScript runtime that allows you to run JavaScript code. It is essential for managing packages and dependencies in your React Native project. You can install it from Node.js downloads .
- react-native-community/cli: This command installs the React Native command line interface (CLI), which provides tools to create, build, and manage your React Native projects. Run the following command to install it:
npm i @react-native-community/cliVirtual Device Setup
To run your app during development, you will need an emulator or a simulator:
- If you are on macOS: For iOS: Install Xcode -> Open Developer Tools -> Simulator
- For Android: Install Java Runtime and Android Studio -> Go to Device Manager and Create an emulator
If you are on Windows or Linux:
- For iOS: We need to rely on cloud-based simulators like LambdaTest and BrowserStack
- For Android: Install Java Runtime and Android Studio -> Go to Device Manager and Create an emulator
If you are curious about the difference between simulators and emulators, you can read this article: Difference between Emulator and Simulator , but to put it simply, emulators replicate both hardware and software, while simulators only replicate software.
For setting up Android Studio, follow this excellent tutorial by Expo : Android Studio Emulator Guide
2. Create the App
Let's start this project!
You can find the full code for this project in the EdgeLLM repo here , there are two folders:
- EdgeLLMBasic : A basic implementation of the app with a simple chat interface
- EdgeLLMPlus : An enhanced version of the app with a more complex chat interface and additional features
First, we need to initiate the app using @react-native-community/cli:
npx @react-native-community/cli@latest init <ProjectName>Project Structure
App folders are organized as follows:
Default Files/Folders
- android/ Contains native Android project files
- Purpose : To build and run the app on Android devices
ios/
- Contains native iOS project files
- Purpose : To build and run the app on iOS devices
node_modules/
- Purpose : Holds all npm dependencies used in the project
App.tsx
- The main root component of your app, written in TypeScript
- Purpose : Entry point to the app's UI and logic
index.js
- Registers the root component ( App )
- Purpose : Entry point for the React Native runtime. You don't need to modify this file.
- tsconfig.json : Configures TypeScript settings
- babel.config.js : Configures Babel for transpiling modern JavaScript/TypeScript, which means it will convert modern JS/TS code to older JS/TS code that is compatible with older browsers or devices.
- jest.config.js : Configures Jest for testing React Native components and logic.
- metro.config.js : Customizes the Metro bundler for the project. It's a JavaScript bundler specifically designed for React Native. It takes your project's JavaScript and assets, bundles them into a single file (or multiple files for efficient loading), and serves them to the app during development. Metro is optimized for fast incremental builds, supports hot reloading, and handles React Native's platform-specific files (.ios.js or .android.js).
- .watchmanconfig : Configures Watchman, a file-watching service used by React Native for hot reloading.
3. Running the Demo & Project
Running the Demo
To run the project, and see how it looks like on your own virtual device, follow these steps:
- Clone the Repository : git clone https://github.com/MekkCyber/EdgeLLM.git
- Navigate to the Project Directory : cd EdgeLLMPlus #or cd EdgeLLMBasic
- Install Dependencies : npm install
- Navigate to the iOS Folder and Install : cd ios pod install
- Start the Metro Bundler : Run the following command in the project folder (EdgeLLMPlus or EdgeLLMBasic): npm start
- Launch the App on iOS or Android Simulator : Open another terminal and run: # For iOS npm run ios # For Android npm run android
This will build and launch the app on your emulator/simulator to test the project before we start coding.
Running the Project
Running a React Native application requires either an emulator/simulator or a physical device. We'll focus on using an emulator since it provides a more streamlined development experience with your code editor and debugging tools side by side.
We start by ensuring our development environment is ready, we need to be in the project folder and run the following commands:
# Install dependencies
npm install

# Start the Metro bundler
npm start
In a new terminal, we will launch the app on our chosen platform:
# For iOS
npm run ios

# For Android
npm run android
This should build and launch the app on your emulator/simulator.
4. App Implementation
Installing Dependencies
First, let's install the required packages. We aim to load models from the Hugging Face Hub and run them locally. To achieve this, we need to install :
- llama.rn : a binding for llama.cpp for React Native apps.
- react-native-fs : allows us to manage the device's file system in a React Native environment.
- axios : a library for sending requests to the Hugging Face Hub API.
npm install axios react-native-fs llama.rnLet's run the app on our emulator/simulator as we showed before so we can start the development
State Management
We will start by deleting everything from the App.tsx file, and creating an empty code structure like the following :
import React from 'react';
import {StyleSheet, Text, View} from 'react-native';

function App(): React.JSX.Element {
  return <View> <Text>Hello World</Text> </View>;
}
const styles = StyleSheet.create({});

export default App;
Inside the return statement of the App function we define the UI rendered, and outside we define the logic, but all code will be inside the App function.
We will have a screen that looks like this:
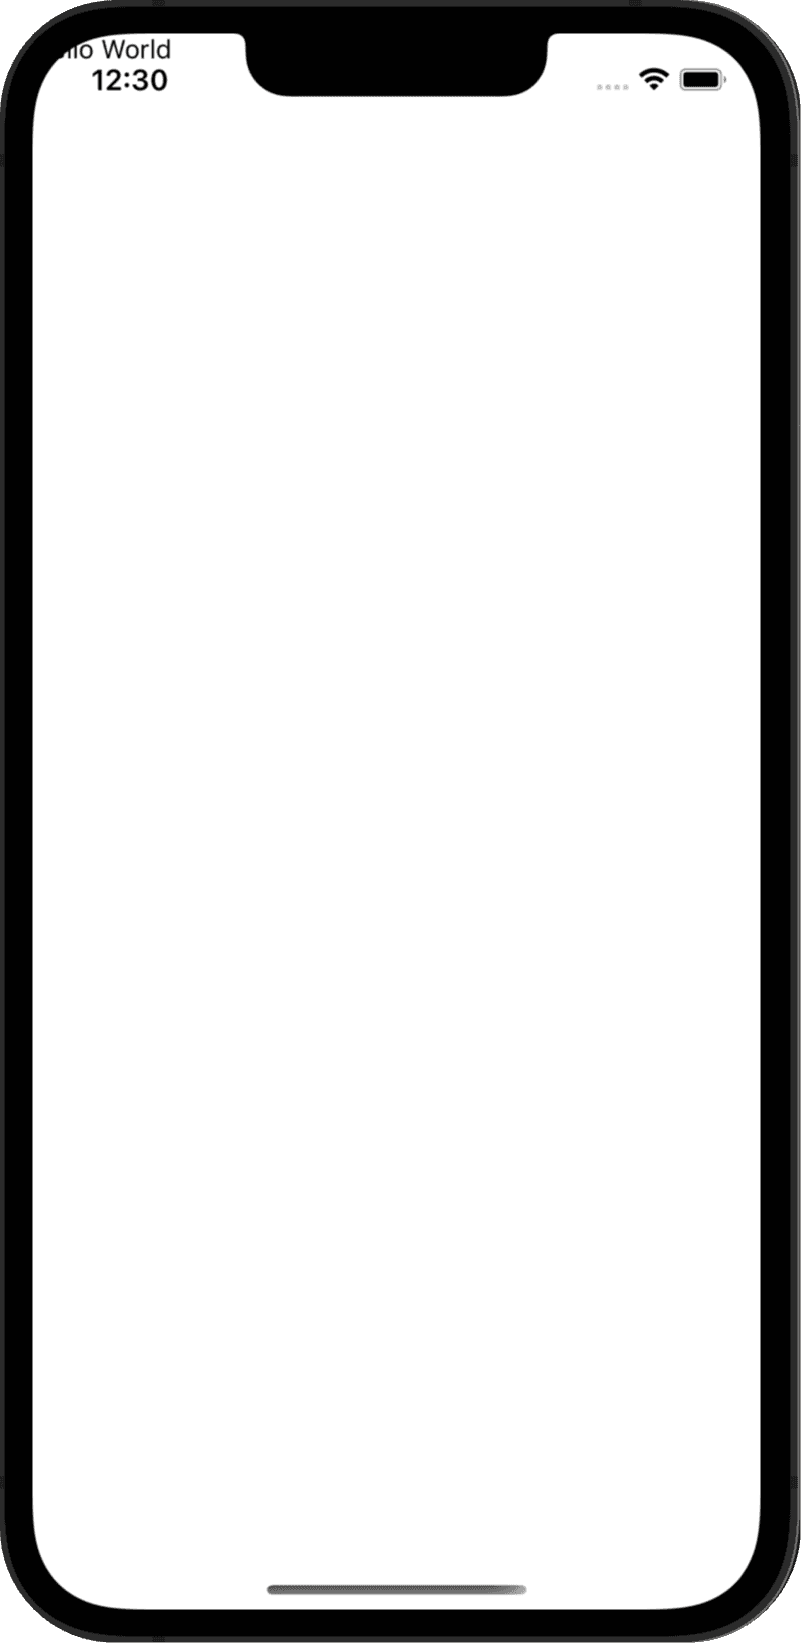
The text "Hello World" is not displayed properly because we are using a simple View component, we need to use a SafeAreaView component to display the text correctly, we will deal with that in the next sections.
Now let's think about what our app needs to track for now:
- Chat-related : The conversation history (messages between user and AI)
- Current user input
Model-related :
- Selected model format (like Llama 1B or Qwen 1.5B)
- Available GGUF files list for each model format
- Selected GGUF file to download
- Model download progress
- A context to store the loaded model
- A boolean to check if the model is downloading
- A boolean to check if the model is generating a response
Here's how we implement these states using React's useState hook (we will need to import it from react)
import { useState } from 'react';
...
type Message = {
  role: 'system' | 'user' | 'assistant';
  content: string;
};

const INITIAL_CONVERSATION: Message[] = [
    {
      role: 'system',
      content:
        'This is a conversation between user and assistant, a friendly chatbot.',
    },
];

const [conversation, setConversation] = useState<Message[]>(INITIAL_CONVERSATION);
const [selectedModelFormat, setSelectedModelFormat] = useState<string>('');
const [selectedGGUF, setSelectedGGUF] = useState<string | null>(null);
const [availableGGUFs, setAvailableGGUFs] = useState<string[]>([]);
const [userInput, setUserInput] = useState<string>('');
const [progress, setProgress] = useState<number>(0);
const [context, setContext] = useState<any>(null);
const [isDownloading, setIsDownloading] = useState<boolean>(false);
const [isGenerating, setIsGenerating] = useState<boolean>(false);
This will be added to the App.tsx file inside the App function but outside the return statement as it's part of the logic.
The Message type defines the structure of chat messages, specifying that each message must have a role (either 'user' or 'assistant' or 'system') and content (the actual message text).
Now that we have our basic state management set up, we need to think about how to:
- Fetch available GGUF models from Hugging Face
- Download and manage models locally
- Create the chat interface
- Handle message generation
Let's tackle these one by one in the next sections...
Fetching available GGUF models from the Hub
Let's start by defining the model formats our app is going to support and their repositories. Of course llama.rn is a binding for llama.cpp so we need to load GGUF files. To find GGUF repositories for the models we want to support, we can use the search bar on Hugging Face and search for GGUF files for a specific model, or use the script quantize_gguf.py provided here to quantize the model ourselves and upload the files to our hub repository.
const modelFormats = [
  {label: 'Llama-3.2-1B-Instruct'},
  {label: 'Qwen2-0.5B-Instruct'},
  {label: 'DeepSeek-R1-Distill-Qwen-1.5B'},
  {label: 'SmolLM2-1.7B-Instruct'},
];

const HF_TO_GGUF = {
    "Llama-3.2-1B-Instruct": "medmekk/Llama-3.2-1B-Instruct.GGUF",
    "DeepSeek-R1-Distill-Qwen-1.5B":
      "medmekk/DeepSeek-R1-Distill-Qwen-1.5B.GGUF",
    "Qwen2-0.5B-Instruct": "medmekk/Qwen2.5-0.5B-Instruct.GGUF",
    "SmolLM2-1.7B-Instruct": "medmekk/SmolLM2-1.7B-Instruct.GGUF",
  };
The HF_TO_GGUF object maps user-friendly model names to their corresponding Hugging Face repository paths. For example:
- When a user selects 'Llama-3.2-1B-Instruct', it maps to medmekk/Llama-3.2-1B-Instruct.GGUF which is one of the repositories containing the GGUF files for the Llama 3.2 1B Instruct model.
The modelFormats array contains the list of model options that will be displayed to users in the selection screen, we chose Llama 3.2 1B Instruct , DeepSeek R1 Distill Qwen 1.5B , Qwen 2 0.5B Instruct and SmolLM2 1.7B Instruct as they are the most popular small models.
Next, let's create a way to fetch and display available GGUF model files from the hub for our selected model format.
When a user selects a model format, we make an API call to Hugging Face using the repository path we mapped in our HF_TO_GGUF object. We're specifically looking for files that end with '.gguf' extension, which are our quantized model files.
Once we receive the response, we extract just the filenames of these GGUF files and store them in our availableGGUFs state using setAvailableGGUFs . This allows us to show users a list of available GGUF model variants they can download.
const fetchAvailableGGUFs = async (modelFormat: string) => {
  if (!modelFormat) {
    Alert.alert('Error', 'Please select a model format first.');
    return;
  }

  try {
    const repoPath = HF_TO_GGUF[modelFormat as keyof typeof HF_TO_GGUF];
    if (!repoPath) {
      throw new Error(
        `No repository mapping found for model format: ${modelFormat}`,
      );
    }

    const response = await axios.get(
      `https://huggingface.co/api/models/${repoPath}`,
    );

    if (!response.data?.siblings) {
      throw new Error('Invalid API response format');
    }

    const files = response.data.siblings.filter((file: {rfilename: string}) =>
      file.rfilename.endsWith('.gguf'),
    );

    setAvailableGGUFs(files.map((file: {rfilename: string}) => file.rfilename));
  } catch (error) {
    const errorMessage =
      error instanceof Error ? error.message : 'Failed to fetch .gguf files';
    Alert.alert('Error', errorMessage);
    setAvailableGGUFs([]);
  }
};
Note: Ensure to import axios and Alert at the top of your file if not already imported.
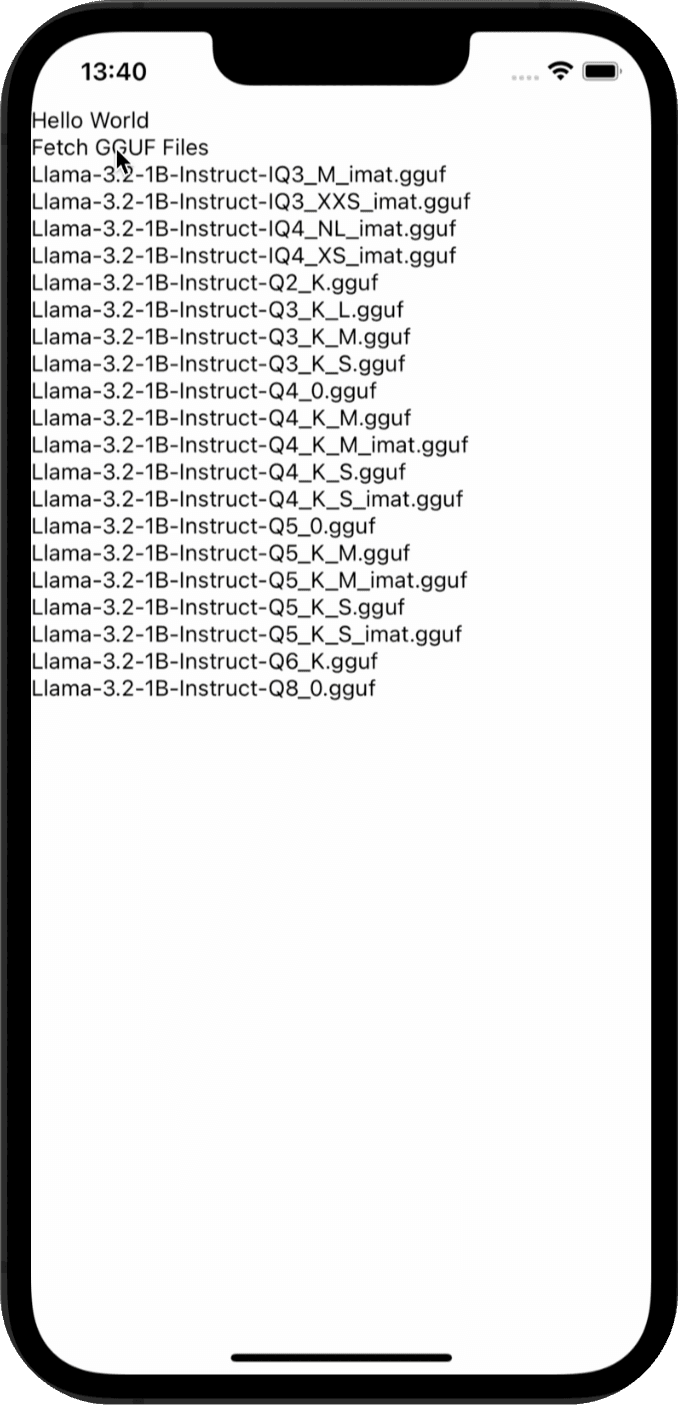
We need to test that the function is working correclty, let's add a button to the UI to trigger the function, instead of View we will use a SafeAreaView (more on that later) component, and we will display the available GGUF files in a ScrollView component. the onPress function is triggered when the button is pressed:
<TouchableOpacity onPress={() => fetchAvailableGGUFs('Llama-3.2-1B-Instruct')}>
  <Text>Fetch GGUF Files</Text>
</TouchableOpacity>
<ScrollView>
  {availableGGUFs.map((file) => (
    <Text key={file}>{file}</Text>
  ))}
</ScrollView>
This should look something like this :
Note: For the whole code until now you can check the first_checkpoint branch in the EdgeLLMBasic folder here
Model Download Implementation
Now let's implement the model download functionality in the handleDownloadModel function which should be called when the user clicks on the download button. This will download the selected GGUF file from Hugging Face and store it in the app's Documents directory:
const handleDownloadModel = async (file: string) => {
  const downloadUrl = `https://huggingface.co/${
    HF_TO_GGUF[selectedModelFormat as keyof typeof HF_TO_GGUF]
  }/resolve/main/${file}`;
  // we set the isDownloading state to true to show the progress bar and set the progress to 0
  setIsDownloading(true);
  setProgress(0);

  try {
    // we download the model using the downloadModel function, it takes the selected GGUF file, the download URL, and a progress callback function to update the progress bar
    const destPath = await downloadModel(file, downloadUrl, progress =>
      setProgress(progress),
    );
  } catch (error) {
    const errorMessage =
      error instanceof Error
        ? error.message
        : 'Download failed due to an unknown error.';
    Alert.alert('Error', errorMessage);
  } finally {
    setIsDownloading(false);
  }
};
We could have implemented the api requests inside the handleDownloadModel function, but we will keep it in a separate file to keep the code clean and readable. handleDownloadModel calls the downloadModel function, located in src/api , which accepts three parameters: modelName , downloadUrl , and a progress callback function. This callback is triggered during the download process to update the progress. Before downloading we need to have the selectedModelFormat state set to the model format we want to download.
Inside the downloadModel function we use the RNFS module, part of the react-native-fs library, to access the device's file system. It allows developers to read, write, and manage files on the device's storage. In this case, the model is stored in the app's Documents folder using RNFS.DocumentDirectoryPath , ensuring that the downloaded file is accessible to the app. The progress bar is updated accordingly to reflect the current download status and the progress bar component is defined in the components folder.
Let's create src/api/model.ts and copy the code from the src/api/model.ts file in the repo. The logic should be simple to understand. The same goes for the progress bar component in the src/components folder, it's a simple colored View where the width is the progress of the download.
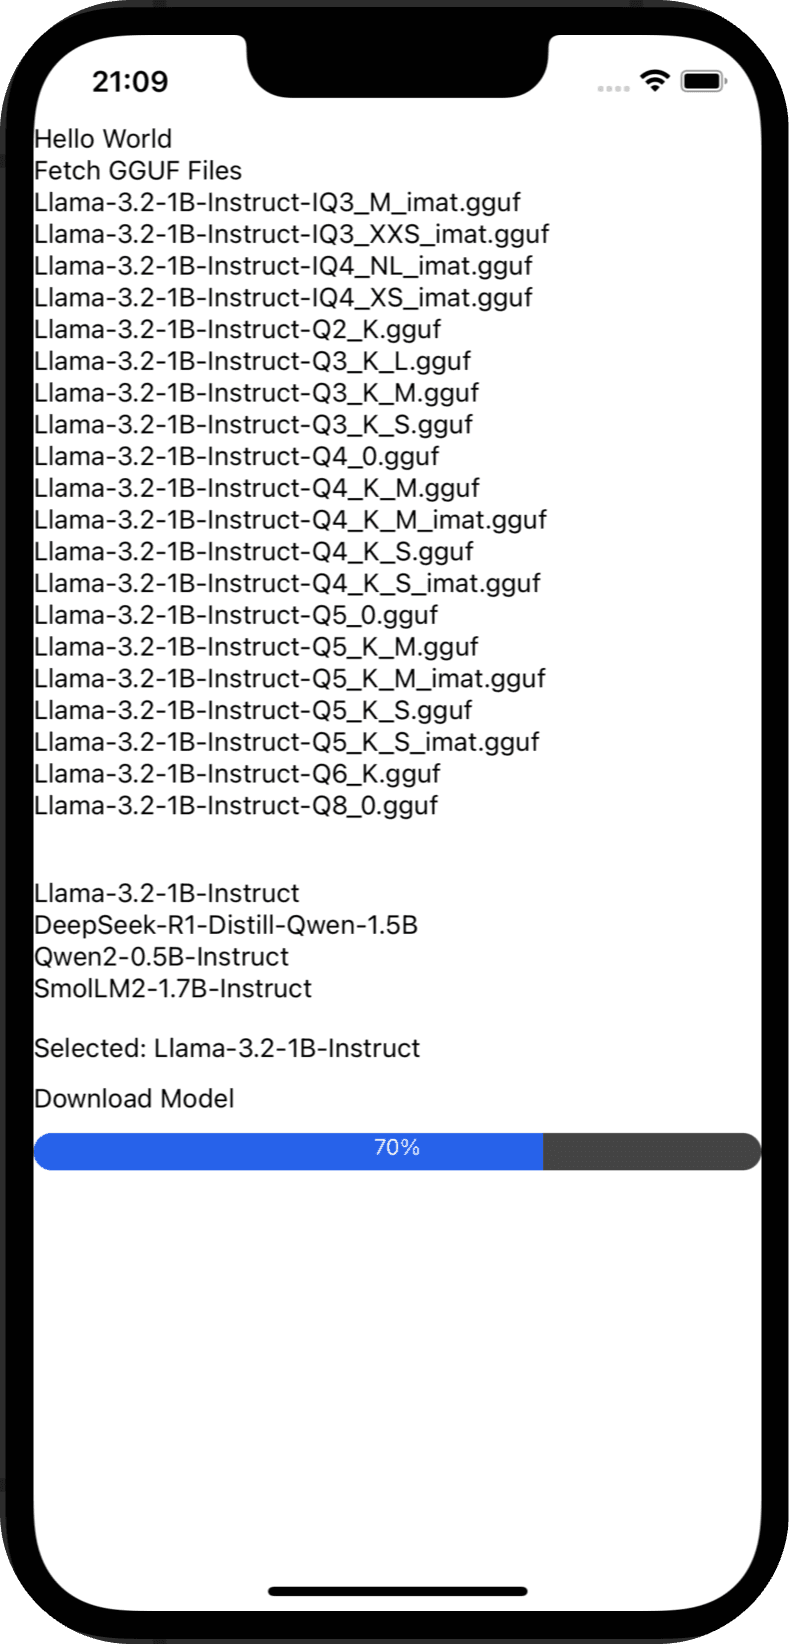
Now we need to test the handleDownloadModel function, let's add a button to the UI to trigger the function, and we will display the progress bar. This will be added under the ScrollView we added before.
<View style={{ marginTop: 30, marginBottom: 15 }}>
  {Object.keys(HF_TO_GGUF).map((format) => (
    <TouchableOpacity
      key={format}
      onPress={() => {
        setSelectedModelFormat(format);
      }}
    >
      <Text> {format} </Text>
    </TouchableOpacity>
  ))}
</View>
<Text style={{ marginBottom: 10, color: selectedModelFormat ? 'black' : 'gray' }}>
  {selectedModelFormat
    ? `Selected: ${selectedModelFormat}`
    : 'Please select a model format before downloading'}
</Text>
<TouchableOpacity
  onPress={() => {
    handleDownloadModel("Llama-3.2-1B-Instruct-Q2_K.gguf");
  }}
>
  <Text>Download Model</Text>
</TouchableOpacity>
{isDownloading && <ProgressBar progress={progress} />}
In the UI we show a list of the supported model formats and a button to download the model, when the user chooses the model format and clicks on the button the progress bar should be displayed and the download should start. In the test we hardcoded the model to download Llama-3.2-1B-Instruct-Q2_K.gguf , so we need to select Llama-3.2-1B-Instruct as a model format for the function to work, we should have something like:
Note: For the whole code until now you can check the second_checkpoint branch in the EdgeLLMBasic folder here
Model Loading and Initialization
Next, we will implement a function to load the downloaded model into a Llama context, as detailed in the llama.rn documentation available here . If a context is already present, we will release it, set the context to null , and reset the conversation to its initial state. Subsequently, we will utilize the initLlama function to load the model into a new context and update our state with the newly initialized context.
import {initLlama, releaseAllLlama} from 'llama.rn';
import RNFS from 'react-native-fs'; // File system module
...
const loadModel = async (modelName: string) => {
  try {
    const destPath = `${RNFS.DocumentDirectoryPath}/${modelName}`;

    // Ensure the model file exists before attempting to load it
    const fileExists = await RNFS.exists(destPath);
    if (!fileExists) {
      Alert.alert('Error Loading Model', 'The model file does not exist.');
      return false;
    }

    if (context) {
      await releaseAllLlama();
      setContext(null);
      setConversation(INITIAL_CONVERSATION);
    }

    const llamaContext = await initLlama({
      model: destPath,
      use_mlock: true,
      n_ctx: 2048,
      n_gpu_layers: 1
    });
    console.log("llamaContext", llamaContext);
    setContext(llamaContext);
    return true;
  } catch (error) {
    Alert.alert('Error Loading Model', error instanceof Error ? error.message : 'An unknown error occurred.');
    return false;
  }
};
We need to call the loadModel function when the user clicks on the download button, so we need to add it inside the handleDownloadModel function right after the download is complete if it's successful.
// inside the handleDownloadModel function, just after the download is complete
if (destPath) {
  await loadModel(file);
}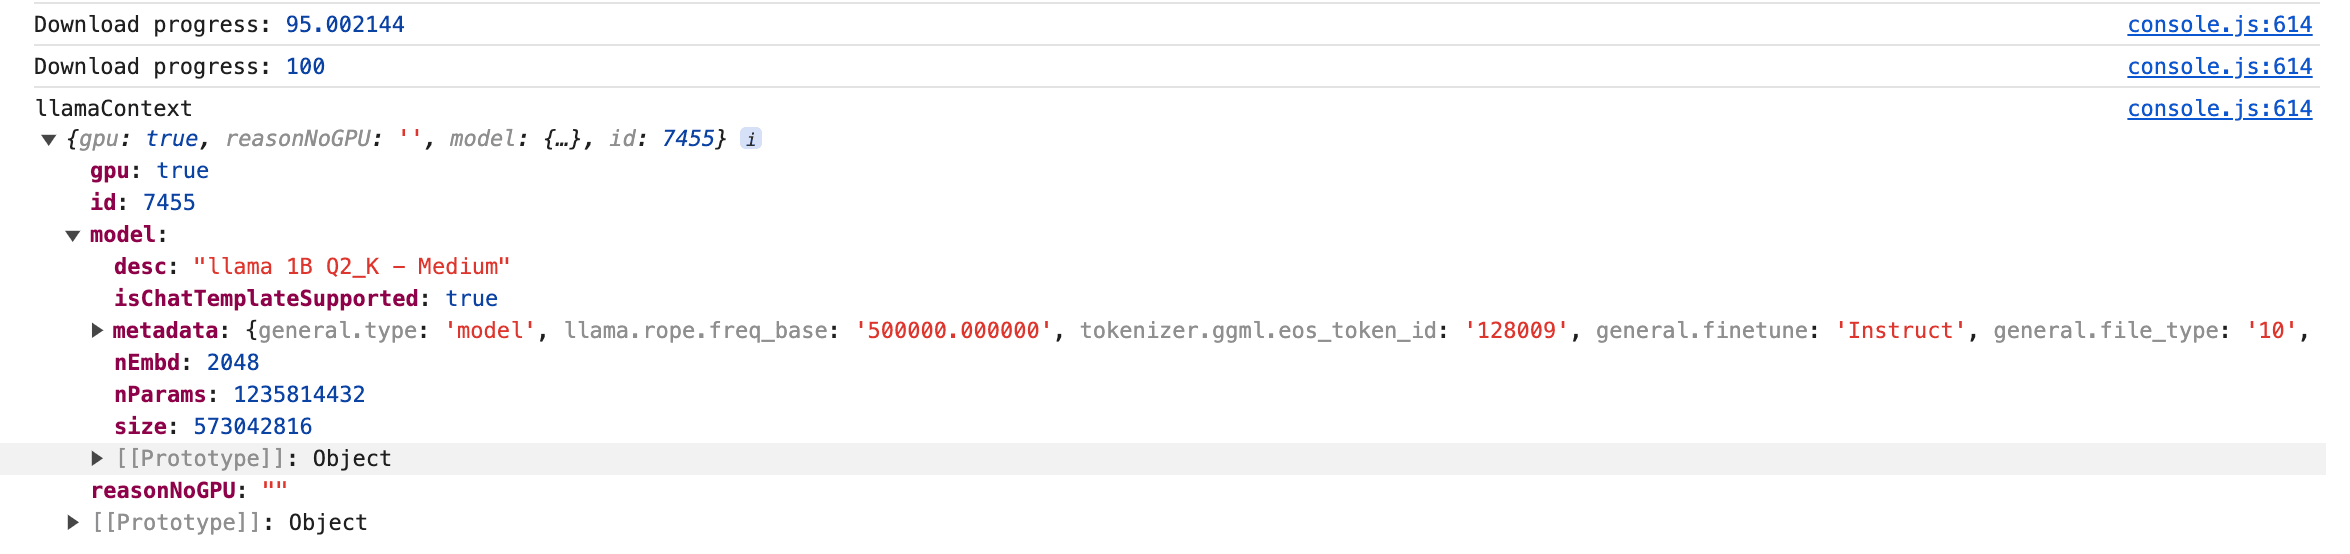
To test the model loading let's add a console.log inside the loadModel function to print the context, so we can see if the model is loaded correctly. We keep the UI the same as before, because clicking on the download button will trigger the handleDownloadModel function, and the loadModel function will be called inside it. To see the console.log output we need to open the Developer Tools, for that we press j in the terminal where we ran npm start . If everything is working correctly we should see the context printed in the console.
Note: For the whole code until now you can check the third_checkpoint branch in the EdgeLLMBasic folder here
Chat Implementation
With the model now loaded into our context, we can proceed to implement the conversation logic. We'll define a function called handleSendMessage , which will be triggered when the user submits their input. This function will update the conversation state and send the updated conversation to the model via context.completion . The response from the model will then be used to further update the conversation, which means that the conversation will be updated twice in this function.
const handleSendMessage = async () => {
  // Check if context is loaded and user input is valid
  if (!context) {
    Alert.alert('Model Not Loaded', 'Please load the model first.');
    return;
  }

  if (!userInput.trim()) {
    Alert.alert('Input Error', 'Please enter a message.');
    return;
  }

  const newConversation: Message[] = [
    // ... is a spread operator that spreads the previous conversation array to which we add the new user message
    ...conversation,
    {role: 'user', content: userInput},
  ];
  setIsGenerating(true);
  // Update conversation state and clear user input
  setConversation(newConversation);
  setUserInput('');

  try {
    // we define list the stop words for all the model formats
    const stopWords = [
      '</s>',
      '<|end|>',
      'user:',
      'assistant:',
      '<|im_end|>',
      '<|eot_id|>',
      '<|end▁of▁sentence|>',
      '<|end▁of▁sentence|>',
    ];
    // now that we have the new conversation with the user message, we can send it to the model
    const result = await context.completion({
      messages: newConversation,
      n_predict: 10000,
      stop: stopWords,
    });

    // Ensure the result has text before updating the conversation
    if (result && result.text) {
      setConversation(prev => [
        ...prev,
        {role: 'assistant', content: result.text.trim()},
      ]);
    } else {
      throw new Error('No response from the model.');
    }
  } catch (error) {
    // Handle errors during inference
    Alert.alert(
      'Error During Inference',
      error instanceof Error ? error.message : 'An unknown error occurred.',
    );
  } finally {
    setIsGenerating(false);
  }
};
To test the handleSendMessage function we need to add an input text field and a button to the UI to trigger the function, and we will display the conversation in the ScrollView component.
<View
  style={{
    flexDirection: "row",
    alignItems: "center",
    marginVertical: 10,
    marginHorizontal: 10,
  }}
>
  <TextInput
    style={{flex: 1, borderWidth: 1}}
    value={userInput}
    onChangeText={setUserInput}
    placeholder="Type your message here..."
  />
  <TouchableOpacity
    onPress={handleSendMessage}
    style={{backgroundColor: "#007AFF"}}
  >
    <Text style={{ color: "white" }}>Send</Text>
  </TouchableOpacity>
</View>
<ScrollView>
  {conversation.map((msg, index) => (
    <Text style={{marginVertical: 10}} key={index}>{msg.content}</Text>
  ))}
</ScrollView>
If everything is implemented correctly, we should be able to send messages to the model and see the conversation in the ScrollView component, it's not beautiful of course but it's a good start, we will improve the UI later. The result should look like this: